Is your faucet constantly dripping or producing a weak stream of water? It might be time to change the screens in your faucets. Don’t wait for those annoying drips to become a major plumbing issue. In this complete guide, we’ll walk you through the process of identifying when it’s time to change the screens in your faucets and how to do it effectively.
Our experts have compiled all the information you need to keep your faucets in top condition. From understanding the signs of a clogged screen to learning the tools required for the job, we’ve got you covered. We’ll also share essential maintenance tips to ensure your faucets continue to run smoothly for years to come.
Don’t let a simple screen change turn into a costly repair. With our comprehensive guide, you’ll have the confidence and know-how to tackle this task on your own. Say goodbye to those pesky drips and hello to a well-functioning faucet. Let’s get started!
What are faucet screens and why do they need to be changed?
Faucet screens, also known as aerator screens or strainers, are small mesh discs or filters located inside the tip of your faucet. Their primary function is to prevent debris, sediment, and other particles from entering and clogging your plumbing system. Over time, these screens can become clogged themselves, leading to reduced water flow, weak streams, and even dripping.
When these screens get clogged, it restricts the flow of water through the faucet. This can result in low water pressure, inconsistent water flow, and an overall unsatisfying user experience. Additionally, the accumulation of debris and sediment can cause damage to internal components of the faucet, leading to costly repairs or replacements down the line.
Changing the screens in your faucets is a preventive maintenance task that ensures smooth water flow, prevents clogs, and extends the lifespan of your faucet. By regularly inspecting and replacing these screens, you can avoid potential plumbing issues and enjoy a consistent water flow in your home.
Signs that it’s time to change your faucet screen
Identifying when it’s time to change your faucet screens is crucial to maintaining the optimal performance of your faucets. Here are some signs that indicate it’s time for a screen change:
- Dripping Faucet: One of the most common signs of a clogged screen is a dripping faucet. If you notice water continuously dripping from your faucet, even when it’s turned off, it’s likely that the screen is partially or fully clogged. This can be caused by mineral deposits, sediment, or debris that has accumulated over time.
- Weak Water Flow: If you’re experiencing a weak stream of water when you turn on your faucet, it could be a result of a clogged screen. When the screen becomes blocked, water flow is restricted, leading to a reduced stream. This can be frustrating when you’re trying to fill a pot or rinse dishes, and it’s a clear indication that a screen change is needed.
- Inconsistent Water Pressure: Another sign that your faucet screens need changing is inconsistent water pressure. If you notice that the water pressure fluctuates or is significantly lower than usual, it’s likely due to a clogged screen. As debris and sediment build up, they can disrupt the flow of water and result in inconsistent pressure.
- Visible Debris or Sediment: Take a close look at the water coming out of your faucet. If you notice any visible debris or sediment particles, it’s a clear indication that your screens are clogged. These particles can not only clog the screens but also cause damage to other components of the faucet if not addressed promptly.
By being aware of these signs, you can proactively identify when it’s time to change the screens in your faucets and avoid further issues down the line.
How often should you change your faucet screen?
The frequency at which you should change your faucet screens depends on various factors such as the quality of your water supply, the amount of use your faucets receive, and the presence of any specific contaminants. However, as a general guideline, it is recommended to inspect and clean your faucet screens at least once every six months.
Regular maintenance and cleaning can help prevent clogs and ensure a smooth water flow. If you notice any of the signs mentioned earlier, it’s essential to check and change the screens as needed, even if it’s before the recommended six-month mark.
In some cases, if you live in an area with hard water or have water with high mineral content, your screens may require more frequent changes. Hard water can lead to the buildup of mineral deposits, making it easier for screens to become clogged. By closely monitoring the condition of your screens and adjusting the replacement frequency accordingly, you can ensure optimal performance and longevity of your faucets.
Tools needed to change faucet screens
Before you embark on changing the screens in your faucets, it’s important to gather the necessary tools. Here are the essential tools you’ll need for the job:
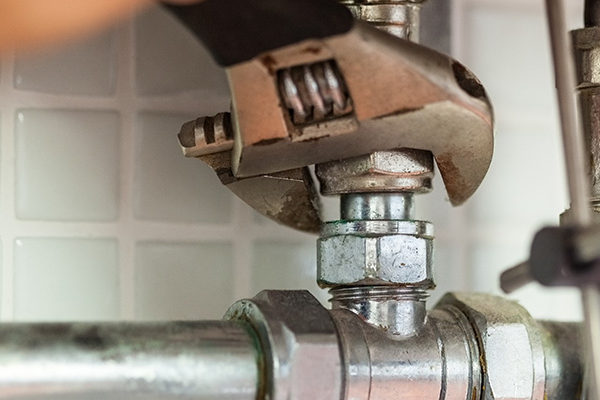
- Adjustable Wrench: An adjustable wrench is a versatile tool that allows you to loosen and tighten various types of nuts and bolts. It will come in handy when removing the aerator or faucet tip that holds the screen in place.
- Needle-Nose Pliers: Needle-nose pliers have long, thin jaws that can grip and maneuver small objects. They are useful for removing and installing screens, especially if they are hard to reach or tightly secured.
- Bucket or Bowl: Having a bucket or bowl nearby will help catch any water that may spill out during the screen removal process. This will prevent unnecessary mess and make cleanup easier.
- Cleaning Solution or Vinegar: Depending on the condition of your screens, you may need a cleaning solution or vinegar to remove any built-up mineral deposits or debris. This will ensure that your screens are thoroughly cleaned before reinstalling them.
By having these tools readily available, you’ll be well-prepared to tackle the screen change process efficiently and effectively.
Step-by-step guide to changing your faucet screen
Now that you have the necessary tools, let’s walk through the step-by-step process of changing the screens in your faucets:
- Prepare your workspace: Start by gathering all the tools you’ll need and placing a bucket or bowl under the faucet to catch any water that may spill. This will help keep your work area clean and prevent any damage to your countertops or floors.
- Turn off the water supply: Before you begin, it’s important to turn off the water supply to the faucet you’ll be working on. Locate the shut-off valves under your sink and turn them clockwise until they are fully closed. This will prevent any water from flowing while you’re removing the screens.
- Remove the aerator or faucet tip: The screen is typically located inside the aerator or faucet tip. Use an adjustable wrench to loosen and remove the aerator or faucet tip from the end of the faucet. If it’s tightly secured, you can use a cloth or rubber band to protect the finish and provide a better grip.
- Inspect and clean the screen: Once the aerator or faucet tip is removed, inspect the screen for any visible debris, sediment, or mineral deposits. If necessary, soak the screen in a cleaning solution or vinegar for a few minutes to dissolve any buildup. Use a soft brush or toothbrush to gently scrub away any remaining residue.
- Rinse and reinstall the screen: After cleaning, rinse the screen under running water to remove any cleaning solution or vinegar. Ensure that the screen is free from any debris or residue before reinstalling it back into the aerator or faucet tip.
- Reattach the aerator or faucet tip: Carefully align the aerator or faucet tip back onto the end of the faucet and hand-tighten it. Use an adjustable wrench to give it a final snug, ensuring it’s secure but not overtightened.
- Turn on the water supply: Once the screen is securely in place, turn the water supply back on by turning the shut-off valves counterclockwise. Slowly open the faucet to check for any leaks and ensure that water is flowing smoothly.
By following these steps, you’ll be able to change the screens in your faucets effectively and restore optimal water flow.
Conclusion: Benefits of regular faucet screen maintenance
Regular maintenance and changing of faucet screens are essential for maintaining the optimal performance of your faucets. By identifying the signs of a clogged screen and proactively addressing the issue, you can avoid plumbing problems such as low water pressure, dripping faucets, and inconsistent water flow.
Changing faucet screens is a simple and cost-effective task that can be done on your own, saving you money on potential repairs or replacements. By following the step-by-step guide outlined in this article and conducting regular inspections and cleanings, you can ensure that your faucets continue to run smoothly for years to come.
Don’t wait for those drips to become a major issue. Take control of your faucets’ performance by regularly changing the screens and maintaining their optimal functionality. With the right tools and knowledge, you’ll be able to enjoy a well-functioning faucet and a hassle-free water flow in your home.
So, what are you waiting for? Grab your tools and get ready to say goodbye to those annoying drips and hello to a smoothly running faucet!
